Micro Macrame Jewelry Tutorial: Crafting Elegant Accessories with Simple Knots
Micro macrame is a delicate and intricate form of macrame that focuses on creating small-scale jewelry pieces using fine cords and detailed knotting techniques. Whether you’re a beginner or an experienced crafter, making micro macrame jewelry is a fulfilling way to produce beautiful, personalized accessories. In this tutorial, we’ll guide you through the basics of micro macrame jewelry making, including the materials you’ll need, essential knots, and a step-by-step project to create your own stylish bracelet.
What is Micro Macrame?
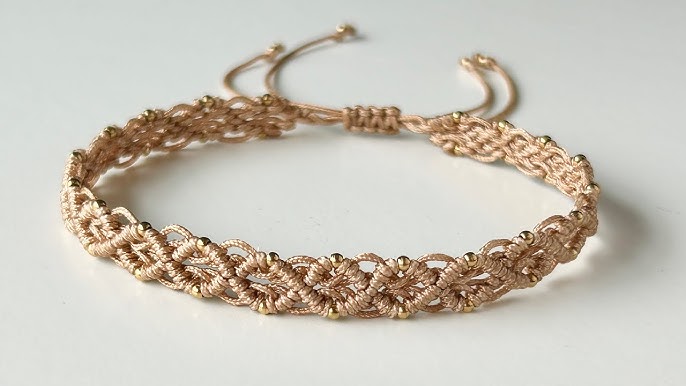
Micro macrame involves knotting thin cords, often nylon or waxed polyester, into intricate patterns to form jewelry like bracelets, necklaces, earrings, and rings. Unlike traditional macrame, which uses thicker ropes for larger projects such as wall hangings or plant holders, micro macrame requires patience and precision, resulting in delicate and elegant pieces.
Materials Needed
- Macrame cord: 0.5mm to 1mm nylon or waxed polyester cords in your chosen colors
- Beads (optional): small glass, metal, or gemstone beads to embellish your design
- Scissors
- Measuring tape or ruler
- Tape or clipboard to hold your work in place
- Jewelry findings: clasps, jump rings, and earring hooks if making necklaces or earrings
- Needle (optional): for threading beads onto the cord
Essential Knots for Micro Macrame Jewelry
Before starting your project, familiarize yourself with these basic knots:
- Lark’s Head Knot: Used to attach cords to a base, like a ring or a clasp.
- Square Knot: The fundamental knot for creating patterns and textures.
- Half Hitch Knot: Used for making curves and decorative edges.
- Double Half Hitch Knot: Creates tight, neat rows and shapes.
Practicing these knots will make your work smoother and more consistent.
Step-by-Step Micro Macrame Bracelet Tutorial
Step 1: Prepare Your Cords
Cut two cords approximately 1 meter long each. Fold them in half and attach the folded end to a clipboard or tape it onto your workspace using a Lark’s Head Knot.
Step 2: Create the Base with Square Knots
Using two working cords, tie a series of square knots for about 10 cm. This will form the main body of your bracelet.
Step 3: Add Beads (Optional)
Slide a bead onto the center cords and secure it with square knots on both sides to keep it in place. Repeat this to add multiple beads spaced evenly along your bracelet.
Step 4: Finish the Bracelet
Once you reach the desired length, create a loop or attach a clasp to one end. On the other end, leave some cord length to tie a knot or attach the corresponding clasp piece.
Step 5: Trim and Seal
Cut any excess cord and carefully melt the ends with a lighter (if using synthetic cords) to prevent fraying.
Tips for Success
- Keep your tension consistent to ensure even knots.
- Use a magnifying glass if working with very thin cords.
- Experiment with color combinations and bead placement for unique designs.
- Practice knots on scrap cords before starting your project.
Conclusion
Micro macrame jewelry is a rewarding craft that combines creativity, patience, and skill. With just a few materials and some practice, you can create stunning handmade accessories perfect for gifts or personal use. Start with simple designs and gradually explore more complex patterns as you grow confident in your knotting abilities. Happy crafting!